Offer valid for
For The First Time Online
Learn The Meditative Art of Tile Doodling
Your first finished piece in under an hour, even if you're a complete beginner.
Imagine if you could:
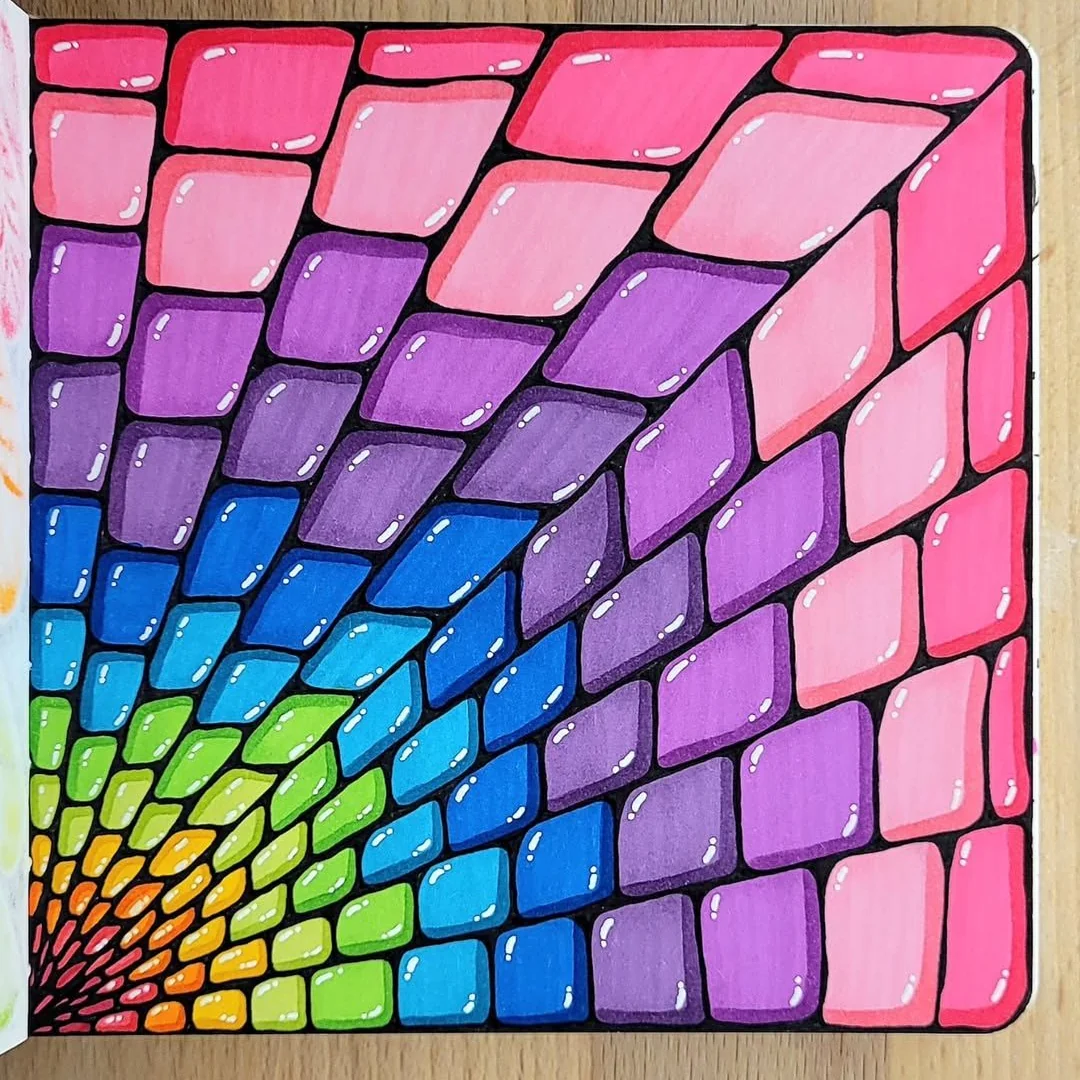
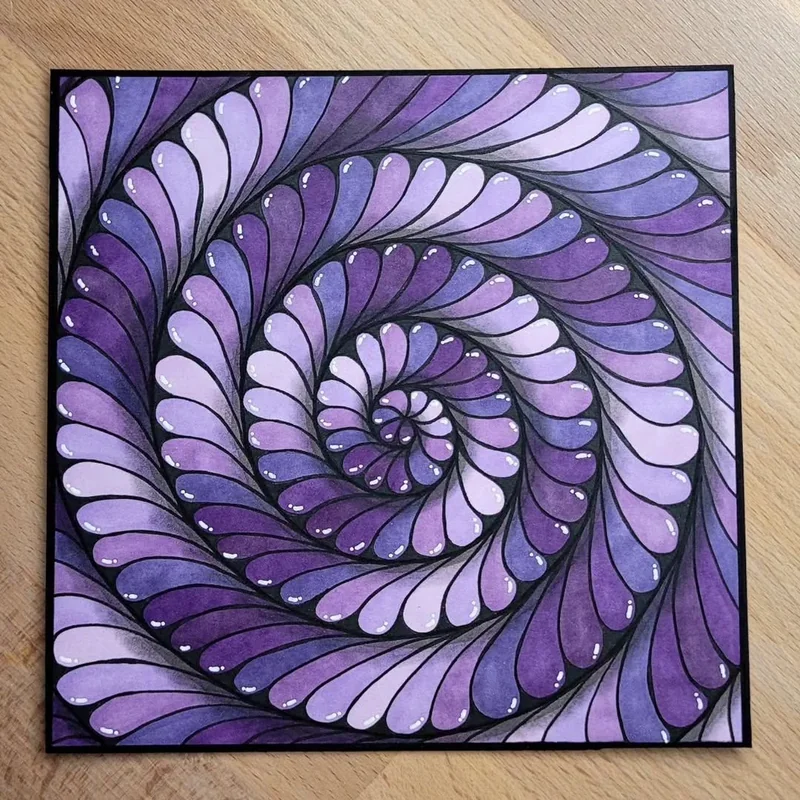
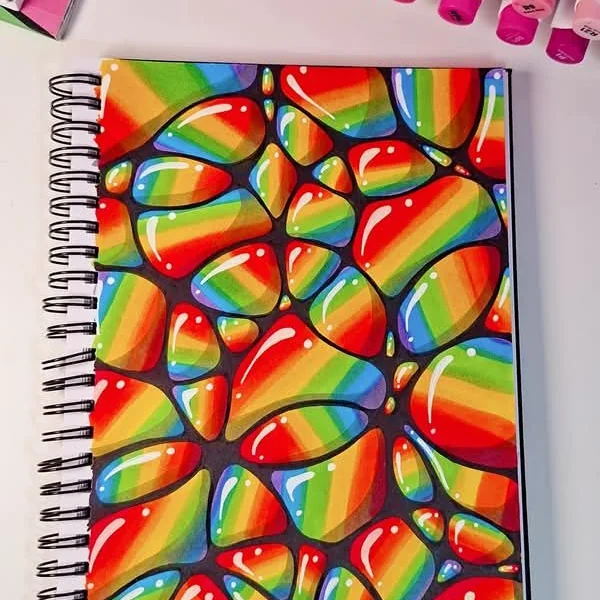
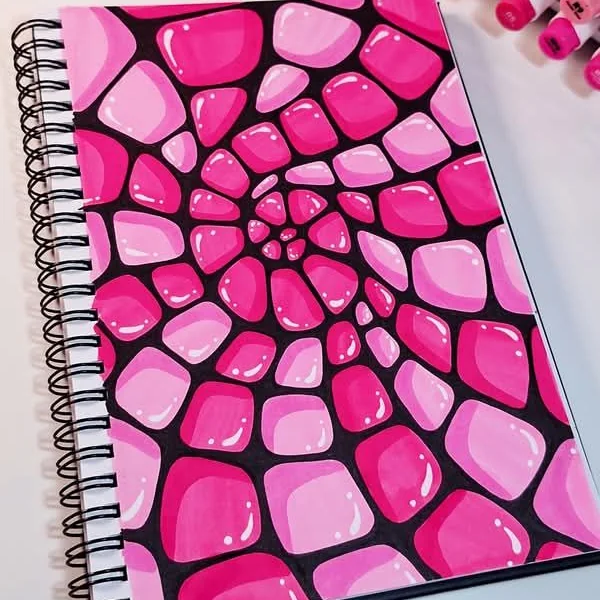
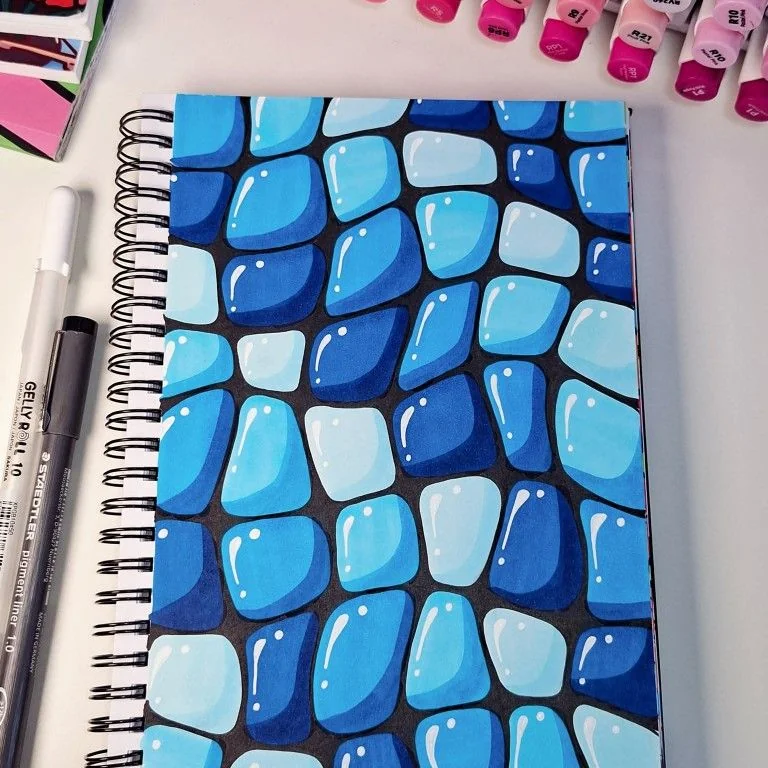
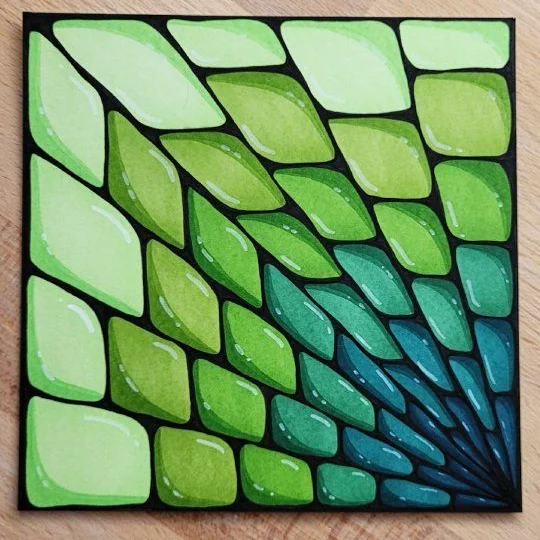
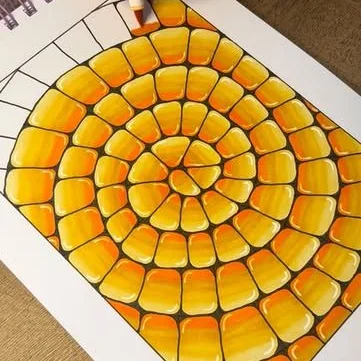
fill a blank page with glossy, three-dimensional tiles that look so good people assume you drew them on a screen.
turn an ordinary sketchbook into a stack of finished art that you can frame, hang on your wall, or gift to someone you love.
have a calming, meditative creative hobby that takes you offline and into a world of lines, color, and quiet focus.
make handmade pieces that cost under $5 in materials but look like they came out of a print shop.
You might be thinking this takes real drawing talent.
Those glossy tiles that look lit from the inside, packed edge to edge across a whole page? It looks like something only a trained illustrator can pull off.
But what if I told you that you don't need artistic talent, expensive equipment, or any prior experience?
Here's what most people don't realize.
The most striking pieces are built from the simplest shapes.
An outline, two shades of one color, and a single stroke of white. $30 of markers. That's all it takes to create something people stop and stare at.
As long as every shape is closed and the light falls the same way in all of them, the page does the rest.
You outline. You fill. You shade. You add the shine. And suddenly, you're holding a piece of art.
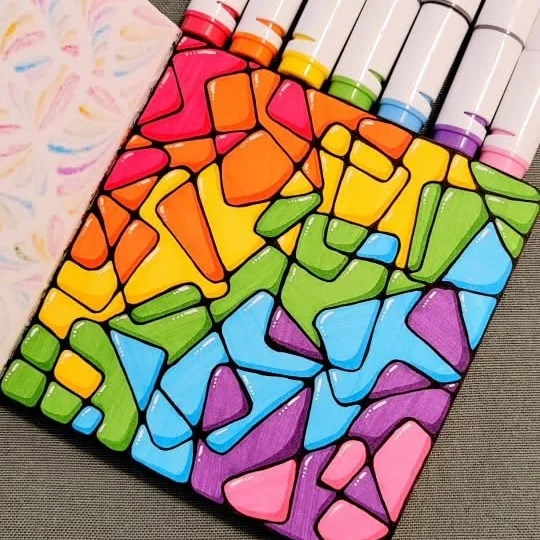
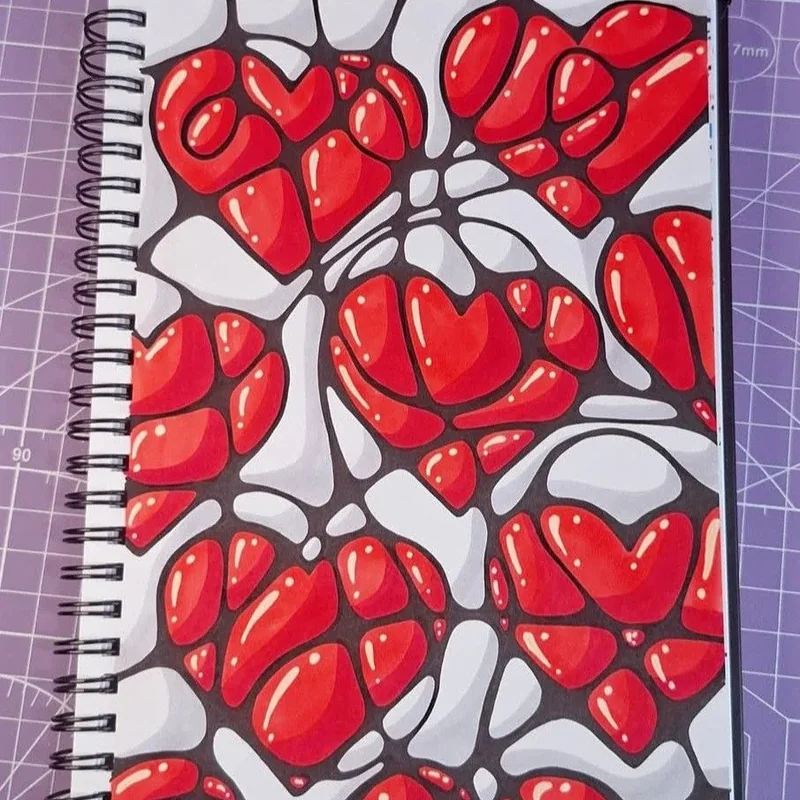
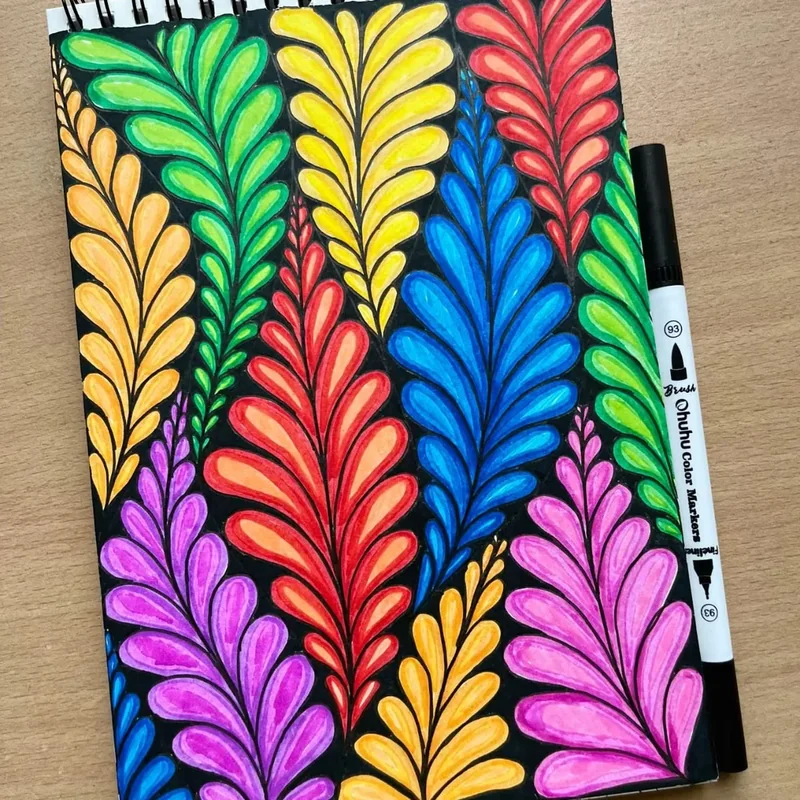
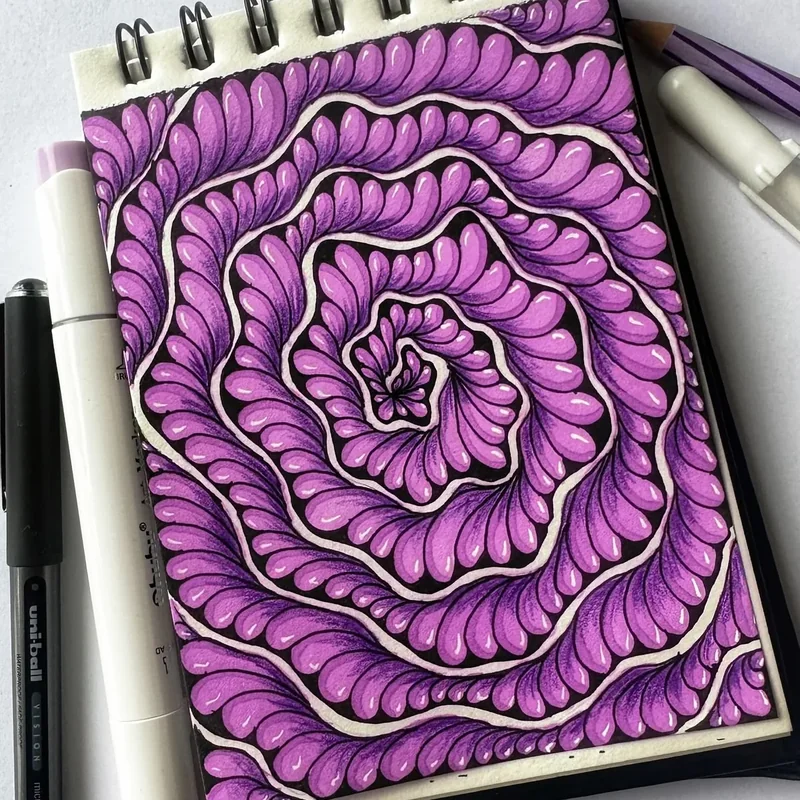
"Will my tiles look as stunning as yours, even if I'm not artistic?"
Yes.
You're not sketching or copying anything real. The technique creates the effect. You just outline, fill, shade, and shine.
If you can sign your name, you can do this.
This course teaches you the three things that matter:
how you close a shape, how you layer your tones, and where you put the light.
Anyone can learn tile doodling.
→ Even if you've never drawn a thing. A clear step-by-step method that works with basic markers and zero experience.
→ Even if you think this kind of art is too complex. It's not. You just never had the right teacher.
→ Even if every craft you've tried ended in frustration. Tile doodling is forgiving by nature. A line that wobbles just becomes a shape with more character.
→ Even if you don't consider yourself "artistic." A black pen, a handful of markers, a white gel pen, and a little patience. That's it.
The Philosophy Behind the Practice
Tile doodling rests on four Japanese ideas that quietly change how you see creativity, patience, and your own hands.
You are never drawing a finished piece. You are drawing this shape, then the one beside it, and the page arrives on its own. That is the entire trick, and it is why something that looks like weeks of work takes one evening.
The oldest idea in Japanese aesthetics: the crooked bowl is the beautiful one. A line that drifts is not a mistake, it is a shape with a personality. Nothing here was ever meant to be symmetrical, so there is nothing to get wrong.
The state a calligrapher works from, where the hand moves and the head stays out of it. You find it somewhere around the fiftieth identical stroke, when the mark is automatic and everything else finally goes quiet.
Tanizaki wrote a whole book on this one: a thing becomes beautiful once you decide where the darkness falls on it. Flat color stays flat until you pick a direction for the light. One pale edge, one dark edge, one white line in the same corner of every shape, and the page lifts off the paper.
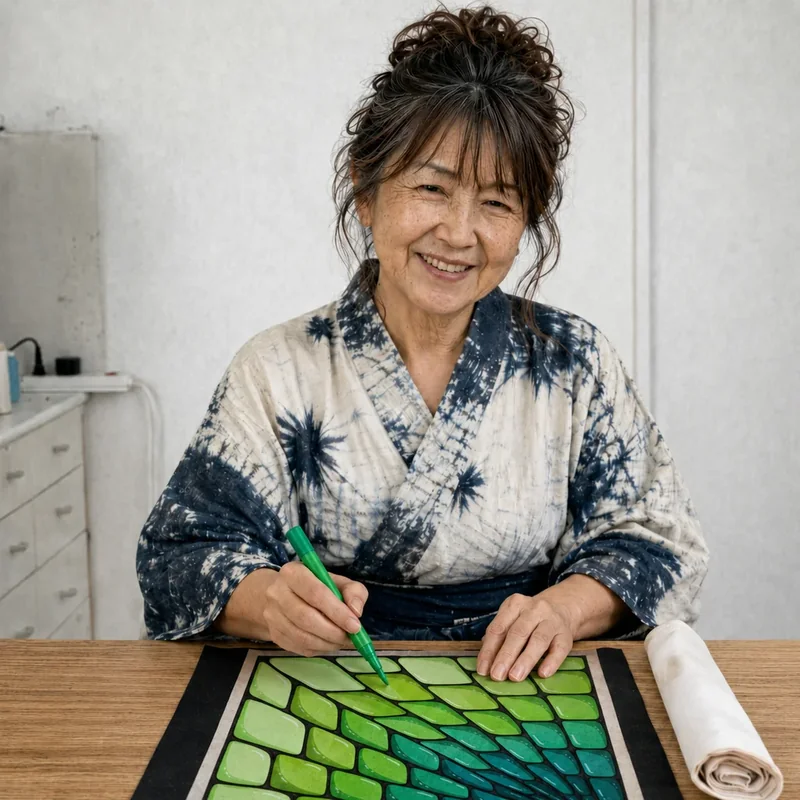
My name is Aiko Mori.
15+ years drawing and teaching pattern art. From tiny sketchbook tiles to full-page spirals to framed commissions. From plain black and white fills to full rainbow blends.
Over 200 original pieces created. Taught 500+ students in workshops across three countries to fill their first page from scratch.
I picked up doodling feeling burned out and creatively empty. Within a week I was drawing on every scrap of paper in my house. That obsession never left. I just learned to channel it.
Introducing: The Tile Doodling
Masterclass
✦ · From a blank page to a piece you want to frame.
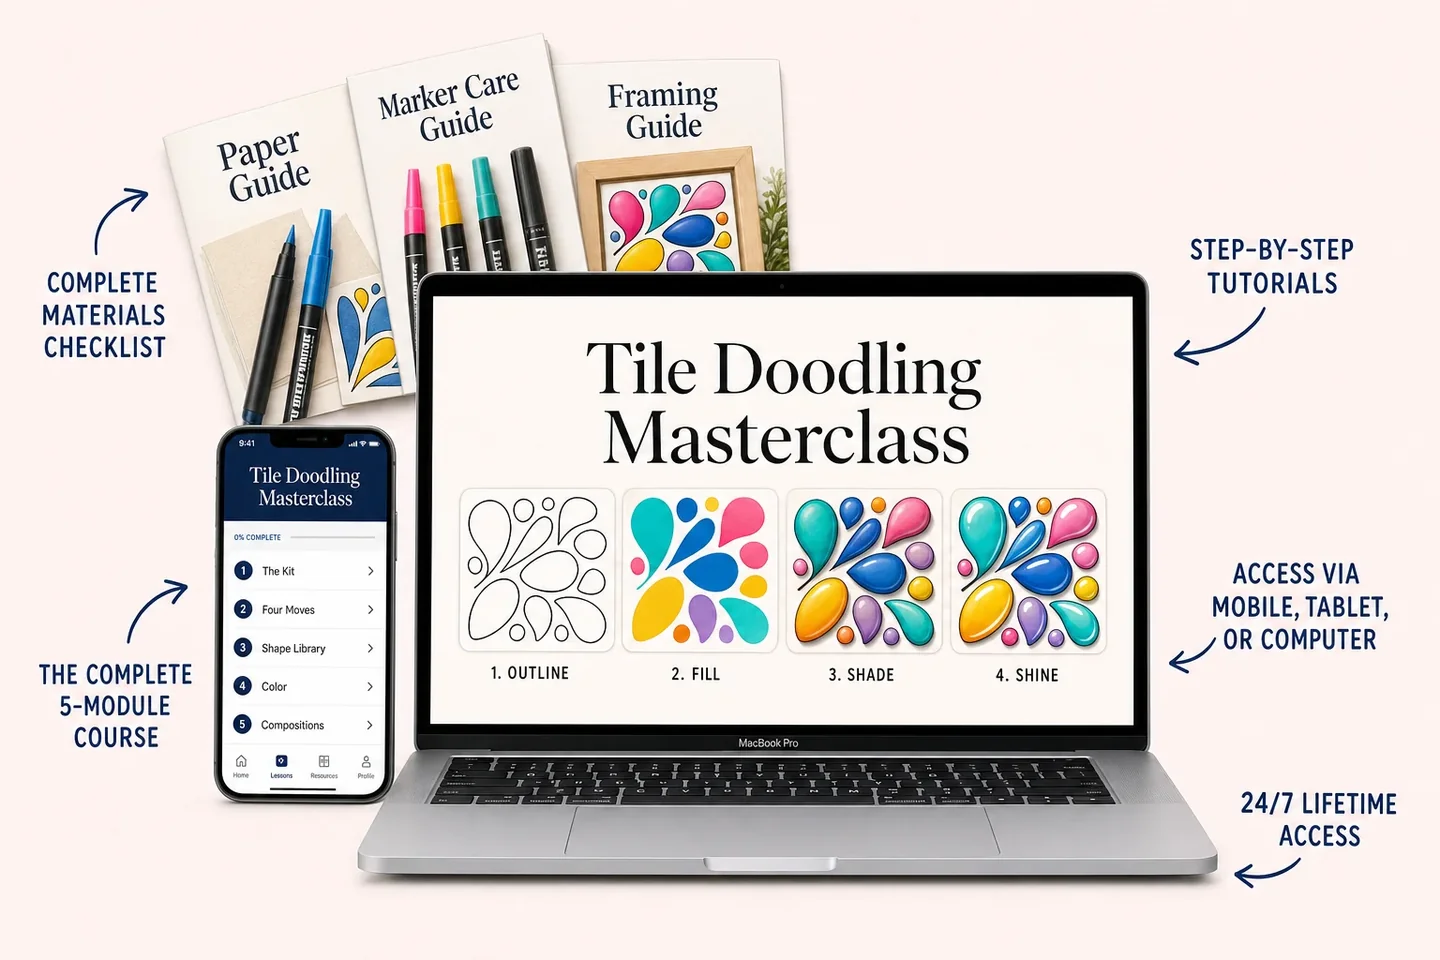
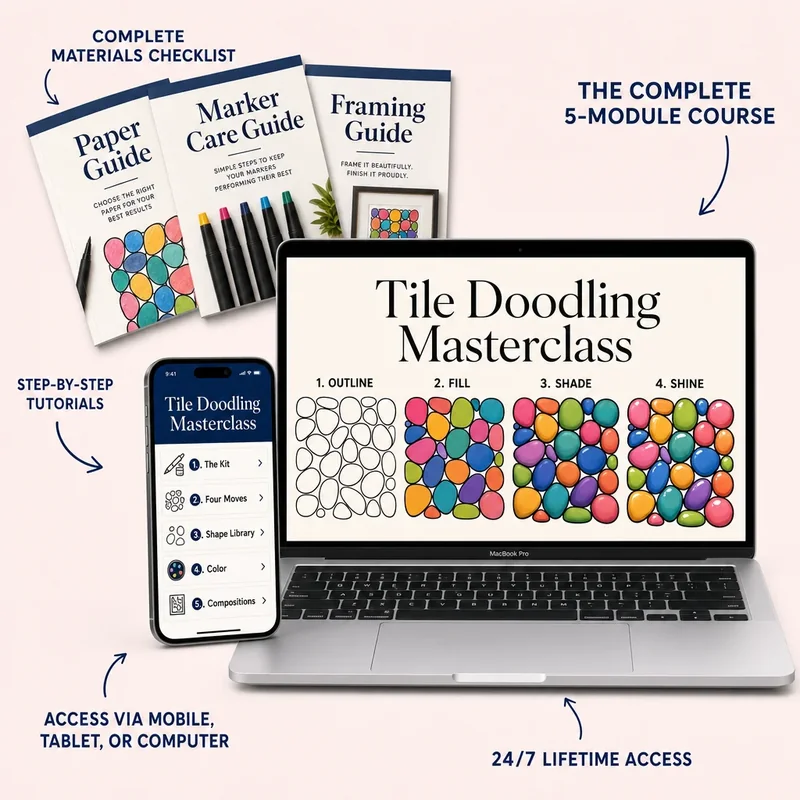
2+ hours of step-by-step videos across 15+ lessons
✦ What's Inside ✦
The Kit (Materials & Setup)
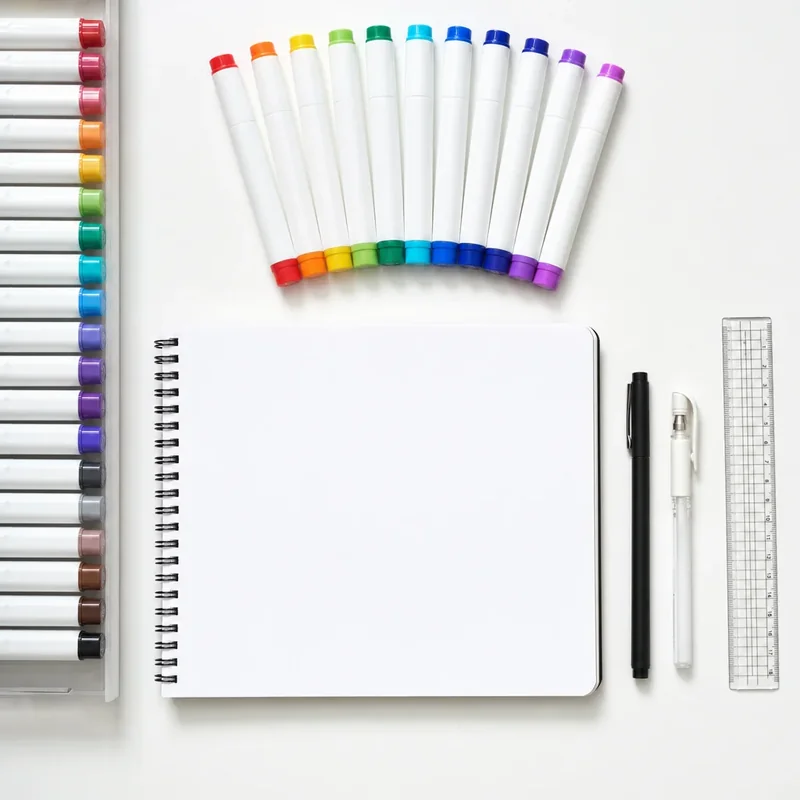
- ✦ The $30 shopping list with exact product links: markers, black fineliner, white gel pen, paper. Everything you need for your first 20+ pages
- ✦ The best markers for beginners and why one small set of 12 beats a case of 80
- ✦ Alcohol vs water based markers: which one to start with, and how to get smooth, streak-free fills out of either
- ✦ How to set up your drawing station at any desk or kitchen table in 10 minutes
Outline, Fill, Shade, Shine (The Four Moves)
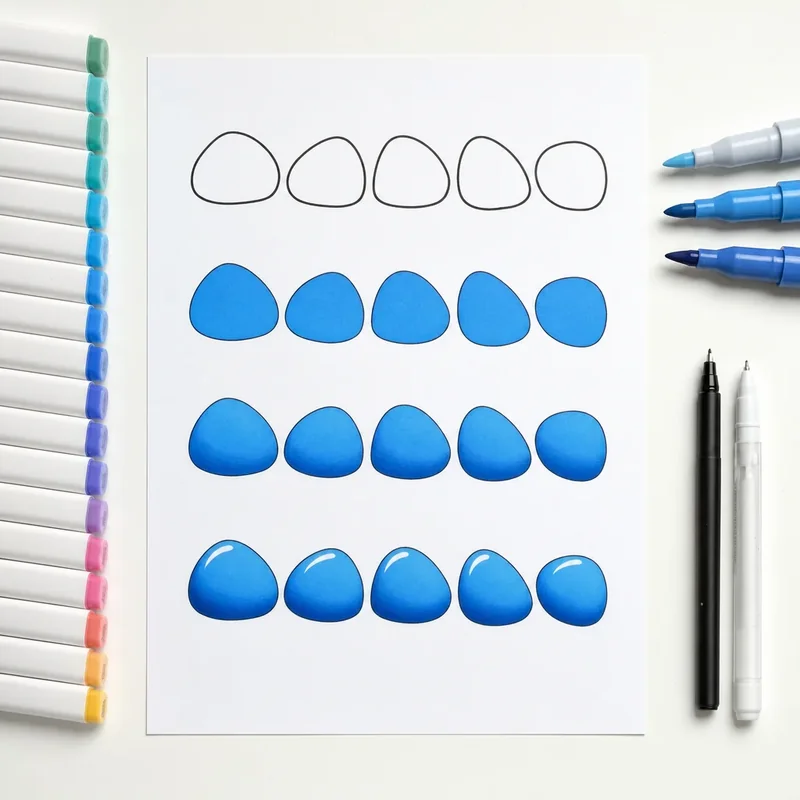
- ✦ How to draw a clean, closed outline, the three things that decide whether a shape reads as a tile or a scribble
- ✦ The three tones (light, mid, deep) and why one marker suddenly looks like three when you layer them
- ✦ The shading pass: where the dark edge goes so every shape on the page curves the same way
- ✦ The white highlight: the single stroke that turns flat color into glass, plus exactly where it goes and where it never goes
The Shape Library (Your Building Blocks)
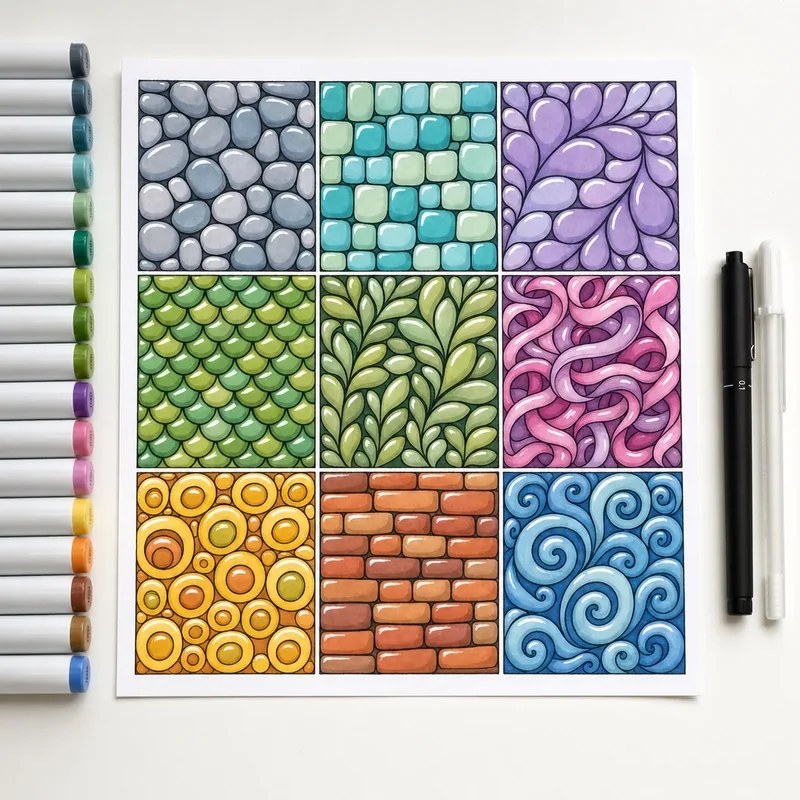
- ✦ Pebbles and river stones: the forgiving first shape, the one you can nail on your very first try
- ✦ Rounded tiles and sea glass: the loose grid that turns a page into a stained glass window
- ✦ Petals and teardrops: the single stroke that builds spirals, feathers, and flower centers
- ✦ Scales, fronds, and ribbons: the repeating marks that fill a background without ever looking empty
Color (Blends, Gradients & Rainbow Flow)
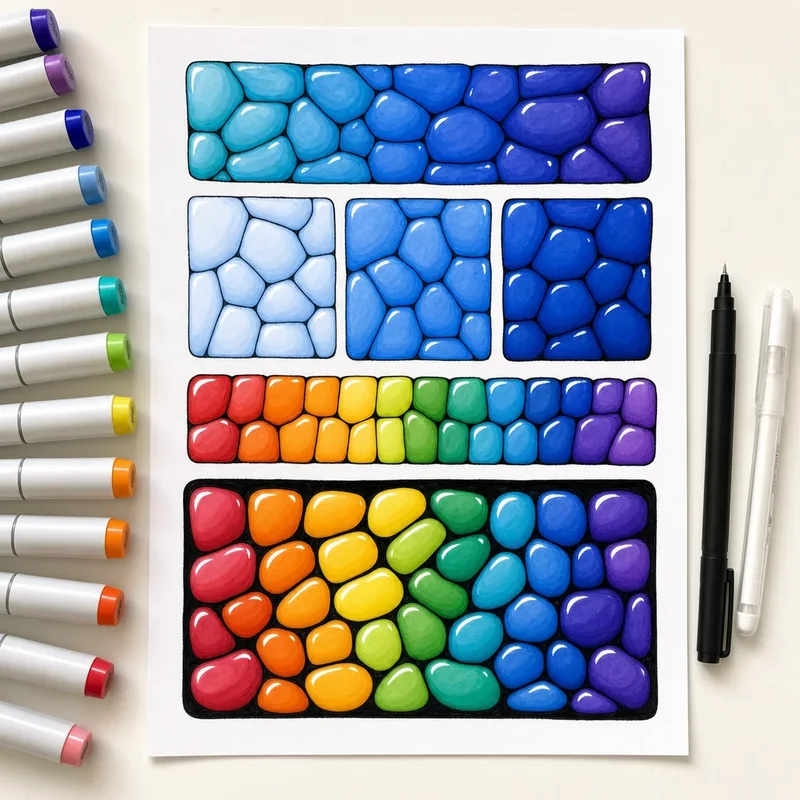
- ✦ One-color depth: how three shades of a single marker read instantly as light, shadow, and shine
- ✦ Blending two markers so the seam disappears completely, including the trick that makes water based pens behave
- ✦ The rainbow run: the order to lay colors down so a full spectrum flows across the page instead of fighting itself
- ✦ Black backgrounds: why a dark fill makes every color glow, and how to get it flat and even with no streaks
Full Compositions (Spirals, Centers & Perspective)
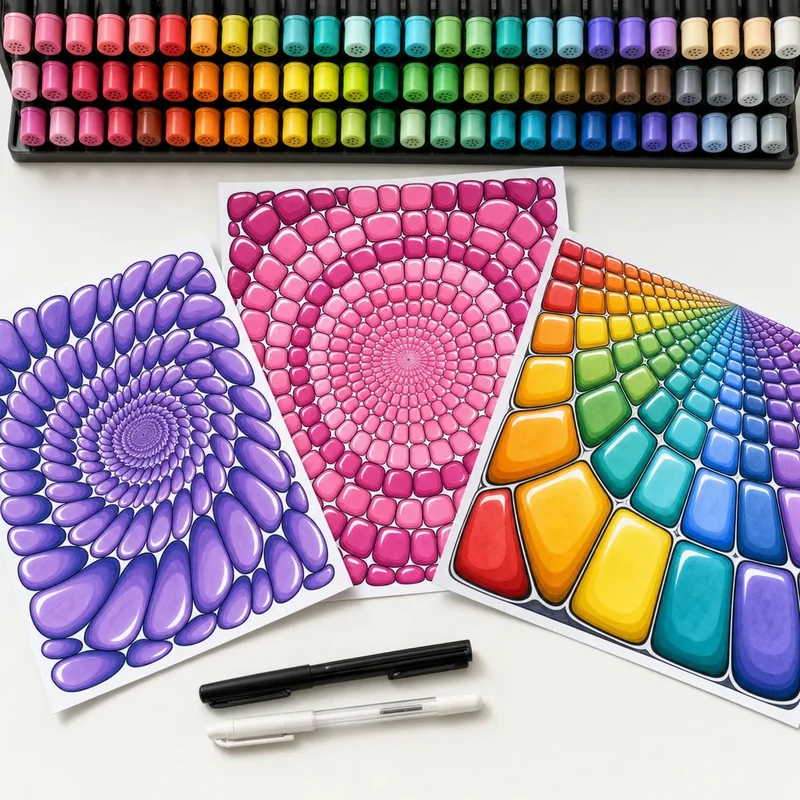
- ✦ The radiating center: rings that grow outward from one point, the layout behind those hypnotic full-page pieces
- ✦ The spiral: how to keep the curve even as it opens, and why the shapes have to grow with it
- ✦ Vanishing point tiles: the perspective grid that makes a flat page look like it drops away into the corner
- ✦ The sampler page: many patterns on one sheet, and the borders that keep it from turning into a mess
You've seen what's inside. Five modules. A complete system for learning, creating, and mastering tile doodling at home.
The full price for this course is $97.
You're not going to pay that today. And the reason is simple.
This is the first time I've offered this course to the public. I want 50 people to go through it. I want to read your emails, see your pages, find out where you get stuck and where you surprise yourself.
That feedback is worth more to me right now than charging full price. Honestly, I also need to find out if I can handle 50 support inboxes without running out of markers.
So for this first group, the price is dramatically lower. Once those 50 spots fill, this page comes down and the full price goes live.
Now Only $47
90 Day Money Back Guarantee
🔒 Secure payment 🔒





P.S. If the next page doesn't load... I'm sorry, but the deal has ended!

Try it risk-free
You don't have to make the final decision now.
Get access to the full course. Get your materials. Learn the four moves. Fill your first page. Watch your work get sharper with every piece.
If you don't love it, email hello@tiledoodling.com within 90 days for a full refund. Within 24 hours. No questions asked.
But wait, there's more
Order today and you also get:
The Paper Guide: Which Papers Take Marker Best
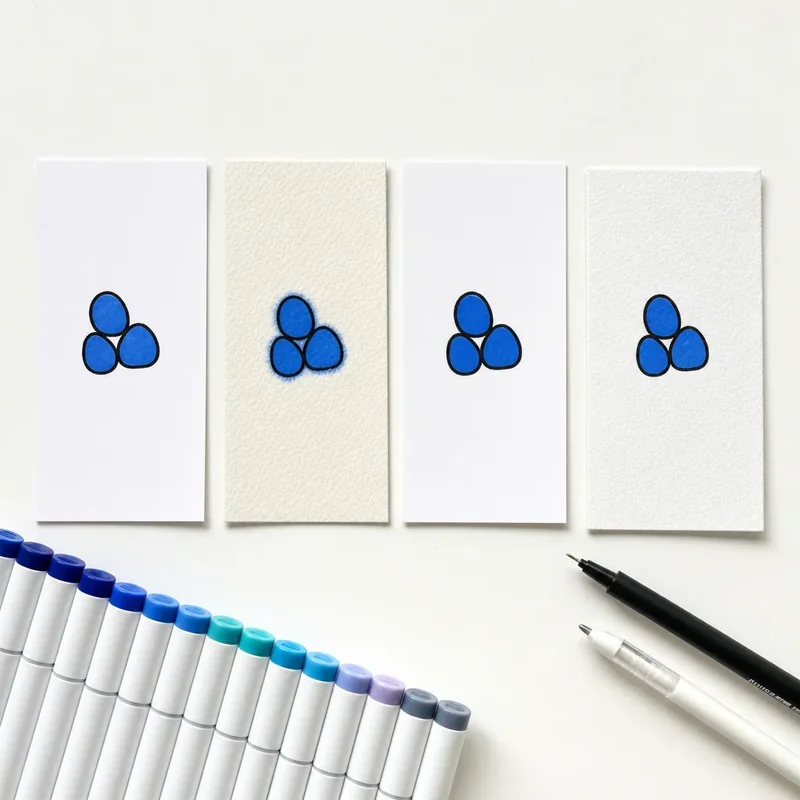
- ✦ Copy paper, sketchbook paper, marker pad, and bristol compared side by side with the same fill so you see exactly how each one takes the ink
- ✦ Where to source the best paper for under $5 a pad, online and locally
- ✦ How to stop bleed-through and ghosting so you can use both sides of every page
- ✦ The best paper for each technique so blends stay smooth and your blacks stay flat
The Marker Care & Revival Guide
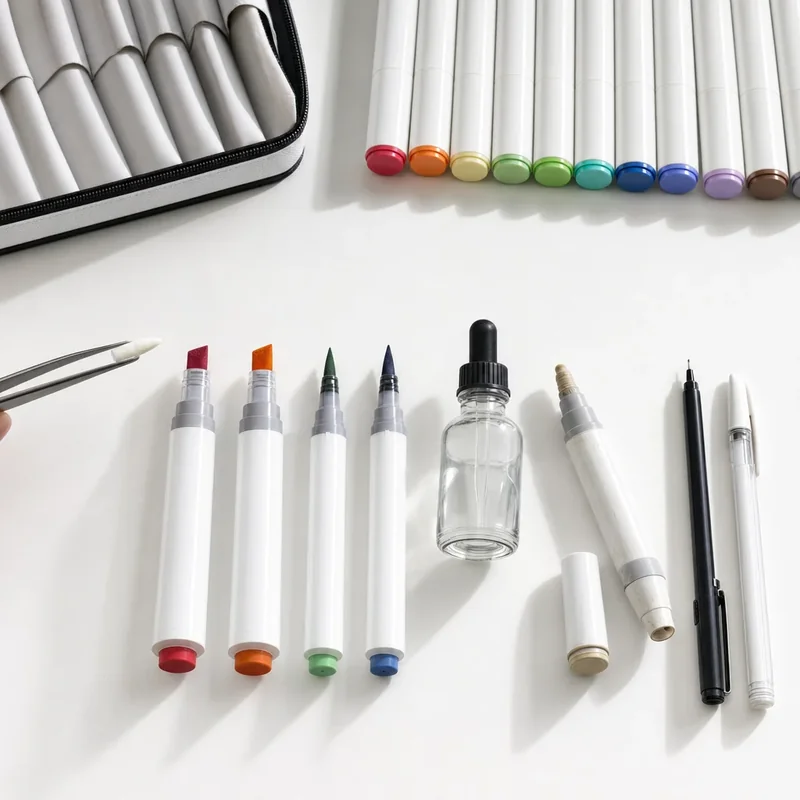
- ✦ How to store your markers so the ink stays in the nib instead of drying out at one end
- ✦ How to revive a dried out marker with a few drops of the right solvent instead of binning it
- ✦ Nib care and swapping: how to clean a color-contaminated tip, and when to just replace it
- ✦ How to refill instead of rebuy and drop the running cost of this hobby to almost nothing
The Finishing & Framing Guide
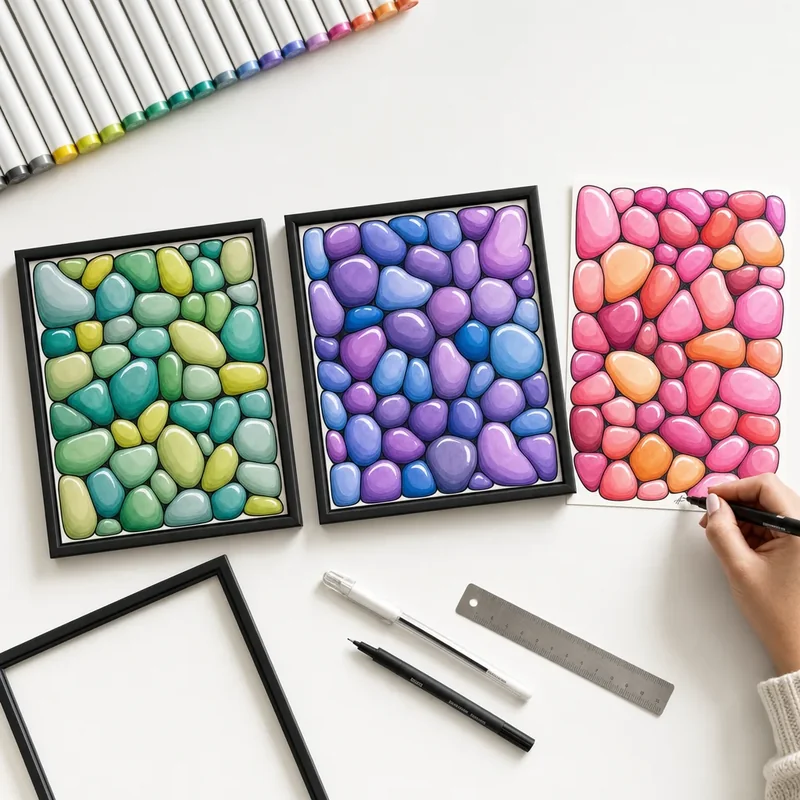
- ✦ How to add a border that makes any page read as deliberate and complete instead of unfinished
- ✦ Where to find frames that fit sketchbook and A5 pages for under $20, plus how to mount without ruining the paper
- ✦ Where a signature goes and why the corner you choose changes how the whole piece reads
- ✦ How to scan and photograph your pages so the colors on screen actually match the ones on paper
Here's everything you get:
Now Only $47
90 Day Money Back Guarantee
🔒 Secure payment 🔒
P.S. If the next page doesn't load... I'm sorry, but the deal has ended!
One last thing...
Order today and you also get:
The Pattern Vault: 8 Fill Patterns
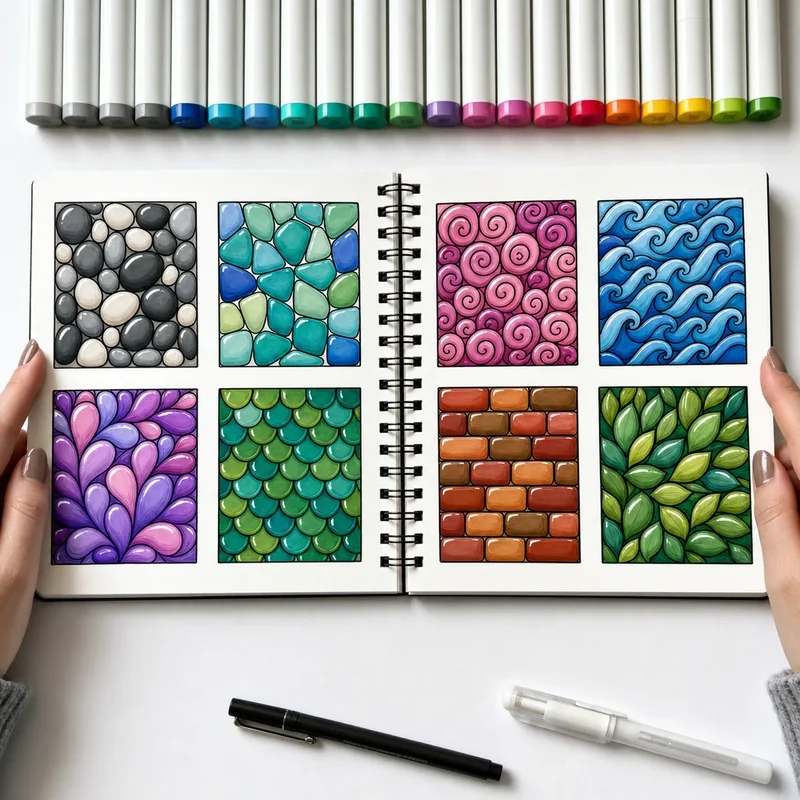
- ✦ 8 patterns ranked by difficulty so you start with the ones you can nail on your first try
- ✦ Step-by-step diagrams for each pattern so you never have to guess what comes next
- ✦ Photos of every pattern in one color and in full color so you know what to expect
- ✦ 5 advanced layouts that combine several patterns, shading, and negative space
Students Usually Ask
None at all. This course is built for complete beginners, including people who haven't drawn anything since school. Module 1 starts with the kit (markers, liner, white pen, paper) and Module 2 walks you through your very first shapes step by step.
Under $30 total. A beginner marker set ($15 to $20), a black fineliner ($3 to $5), a white gel pen ($3), and a pad of marker paper ($5 to $10). The course includes a complete shopping guide with links. You do NOT need an 80 marker case.
Yes. Module 1 walks you through exactly which materials to start with based on the kind of pages you want to make first. It also includes a shopping guide with specific links so you know exactly where to buy everything and what to avoid.
Everything you need costs under $30. A basic starter kit includes: a set of markers, a black fineliner, a white gel pen, and smooth paper. Module 1 covers exactly what to buy and where, and which single set to get if you only want to buy one thing.
Absolutely. All you need is a desk, a table, or your lap. No studio, no water, no drying time, no cleanup. Most of our students draw at their kitchen table or on the sofa.
Yes. Markers, fineliners, and gel pens are sold everywhere and ship internationally. The course names specific brands but gives a budget alternative for every one of them, so you can build the kit from whatever your local shop stocks.
Your first page takes about 30 minutes to 1 hour from blank paper to finished. Outlining takes 10 to 15 minutes, filling takes 15 to 30, and the shading and highlight pass takes another 5 to 10. Bigger pieces you can spread across several evenings and pick up exactly where you left off.
Your very first page will have that glossy, three-dimensional look. That happens in under an hour. The effect comes from the shading and the highlight, not from years of practice. The initial "wow" moment is immediate. Every page after that just gets more refined.
Tile doodling is fundamentally different from realistic drawing. Nothing here has to look like anything. The pieces are built from repeated simple shapes, not from detailed sketching. If you can sign your name, you can do this. The technique does the artistry for you.
The course covers every common mistake so you can fix almost any issue on your next page. But honestly, even an imperfect page looks good. Nothing here was ever meant to be symmetrical, so there is very little to get wrong. And with paper costing a few cents a sheet, a learning experience is never a disaster.
90-day money-back guarantee. Try the entire course. Get your materials. Fill your first page. If you don't love it, email us within 90 days and we'll refund you in full. No questions asked. No hoops.
Instant access to our private course platform. All video lessons and downloadable PDFs organized by module. Watch on any device: phone, tablet, or computer. Lifetime access, so go at your own pace. There's no schedule and no expiration.
Yes. Payments are processed through Stripe, the same secure payment platform used by millions of businesses worldwide (including Amazon, Google, and Shopify). We never see your card details.
No. Both alcohol and water based markers are non-toxic and safe on skin. Alcohol markers can leave a mark on your fingers that fades in a day or two, and they do have a solvent smell, so the course suggests an open window or a water based set if you are sensitive to it. Water based markers wash straight off with soap. There are no harsh chemicals involved.
Email us at hello@tiledoodling.com and we'll get back to you as soon as possible.
Here's everything you get:
Now Only $47
90 Day Money Back Guarantee
🔒 Secure payment 🔒
P.S. If the next page doesn't load... I'm sorry, but the deal has ended!